Clay Pattern:
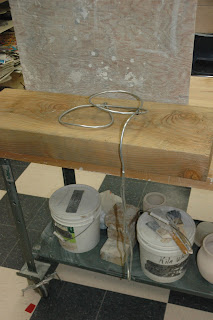
This clay sculpture began with an aluminum armature.
The aluminum armature is covered in clay and the surface is refined.
This piece is a wall/shelf piece and will ultimately be cast in aluminum and polished.
 First establish the seam lines:
Draw the seam lines using a tool on clay or a sharpie pen on other materials.
Roll out a 3/8" thick clay slab and cut 1"-1 1/4" wide strips of clay.
Wet the edge of the clay strips (shim) and attach the strips along the established seam lines. Refine and smooth the strips edge to get rid of any texture. Seams should be as smooth as possible.
Plaster does not stick to wet (leather hard) clay, so no release is needed. On any other surface a release is required.
- For porous surfaces- Murphy's oil soap or 50/50 mix of petrolatum/mineral spirits works well.
- For non-porous surfaces: silicon spray lubricant, Smooth-On Universal Release, WD40, baby oil, and pam are a few good options.

Pottery Plaster #1 is specially formulated for mold-making and has a mix ratio of 70 parts water to 100 parts plaster by weight. This chart is the water (qts) to plaster (lbs) ratio chart I use.
Use a scale to weight the correct amount of powder plaster, and measure the total amount of water needed before mixing.
Water temperature dictates set time of the plaster. The hotter the water, the faster the set time. Cold to lukewarm water is best.
Add powdered plaster to water by sifting in by hand and allow it to set for a minute or three before blending.
But a scale never fails!

Mix plaster and water slurry in bucket until it begins to thicken. Run you tool or finger across the surface of plaster, a trail should be left for half a second. This is the indication the plaster is setting up.
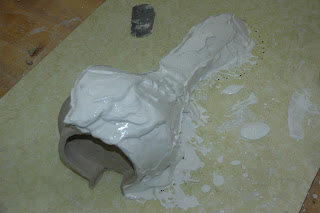
 Using a paint brush begin applying plaster. This first layer is critical, as it is capturing the detail. Be careful not to capture any air bubbles in this first coat.
Continue to apply the plaster until you have the proper plaster mold thickness. Once the plaster slurry is in the "frosting" state, I move to applying with a frosting knife. And like frosting a cake, evenly apply the plaster to the pattern following the contours of the object as well as using the clay shims as a guide to establish even mold wall thickness.
For most small to medium plaster molds a wall thickness of 1" - 1 1/2" is ideal.
Once the plaster slurry has moved past the frosting stage it enters the carving stage. During this stage the plaster is easily tooled into a smooth and uniform surface.
Pictured is the back side of the mold with the clay shim still in place.
As soon as the plaster gets hot (not warm), but hot to the touch, remove the clay shim and clean up the seam. Remove any imperfection, as mold seams need to be as flat and uniform as possible.
Using the rounded end of a frosting knife or a spoon cut round keys into the plaster every 4" to 6" along the seam. Be careful not to create undercuts by making them too deep. As a rule, a key should be wider then it is deep.
Next apply multiple coats of release (Murphy's oil soap or 50/50 vasoline/mineral spirits blend) on the plaster seam line. Be careful not to apply too much so that it puddles.
Using the same mixing and application steps as above apply plaster slurry to the next section of the mold.
Using the frosting knife shape the contours of the mold again.
The bottom cap with clay shim.
Cut keys and shape seam clean.
Apply the release on the plaster seam again;
Fill section #3. Keep track of the seams.
In an inconspicuous place, in my case the back top, make a pour spout. Draft the pour spout in all directions so it will release from the mold easily.
Again, clean up the seam and cut the keys;
apply 2-3 coats of release;
Mix plaster, apply and shape the final section of the mold.
Repeat this until you have effectively encasing the pattern completely.
Lastly, after the last section sets (heats up) use putty knives and a hammer to pop open the seams. This step is tricky, start at the top around the pour spout and work your way down the seam until it pops. Be careful, the plaster is easily broken during this stage.
To dry the mold for its final cure strap the sections in place and dry them together. Plaster may warp if dried separately.
Place mold in front of a fan until dry.
Now it is ready to use for casting or press molding!


This comment has been removed by the author.
ReplyDelete